
Making Buttons That Change Materials
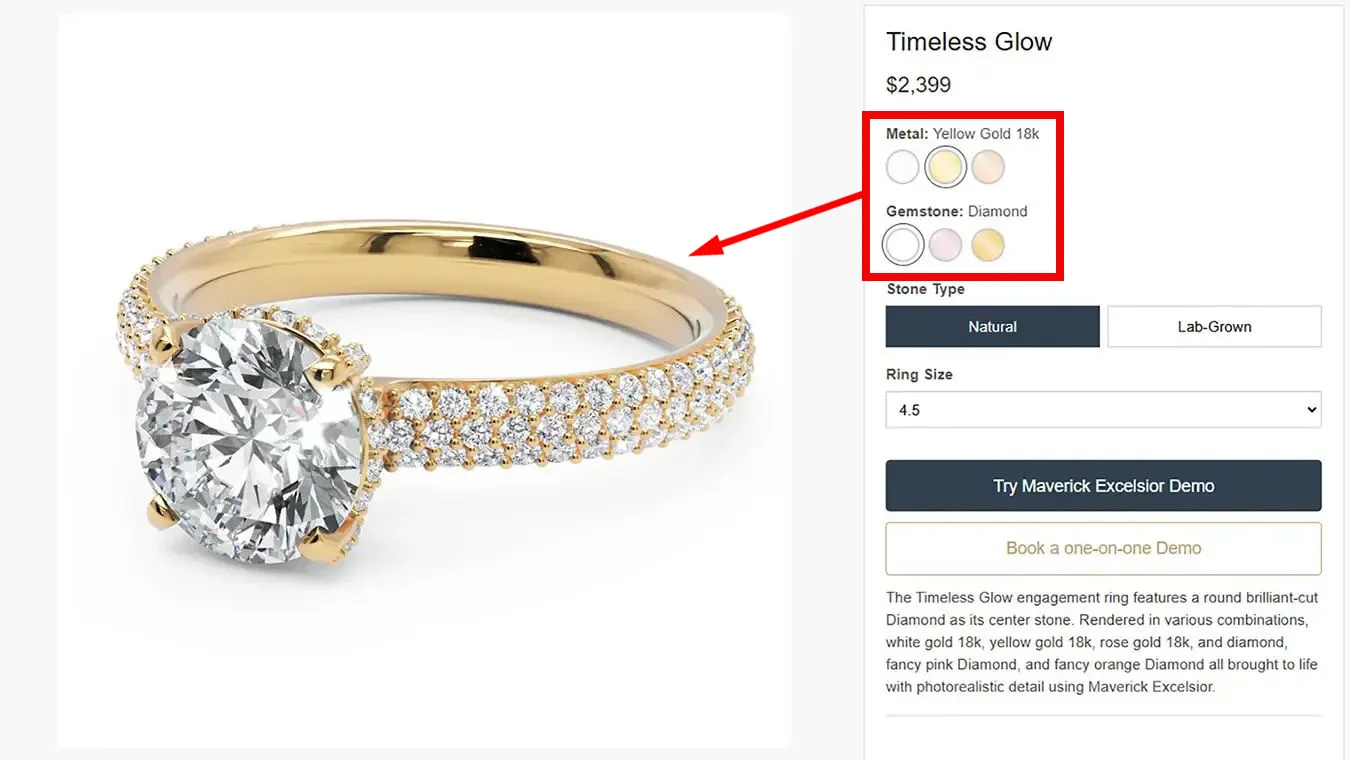
Remember in our last post where we hosted the Maverick Excelsior viewer on our own website? Today we're taking it to the next level: making buttons that actually change the materials in your jewelry piece.
Imagine having "Silver" and "Gold" buttons on your product page. When customers click them, the ring instantly changes material. No page refresh, no loading. Just instant feedback.
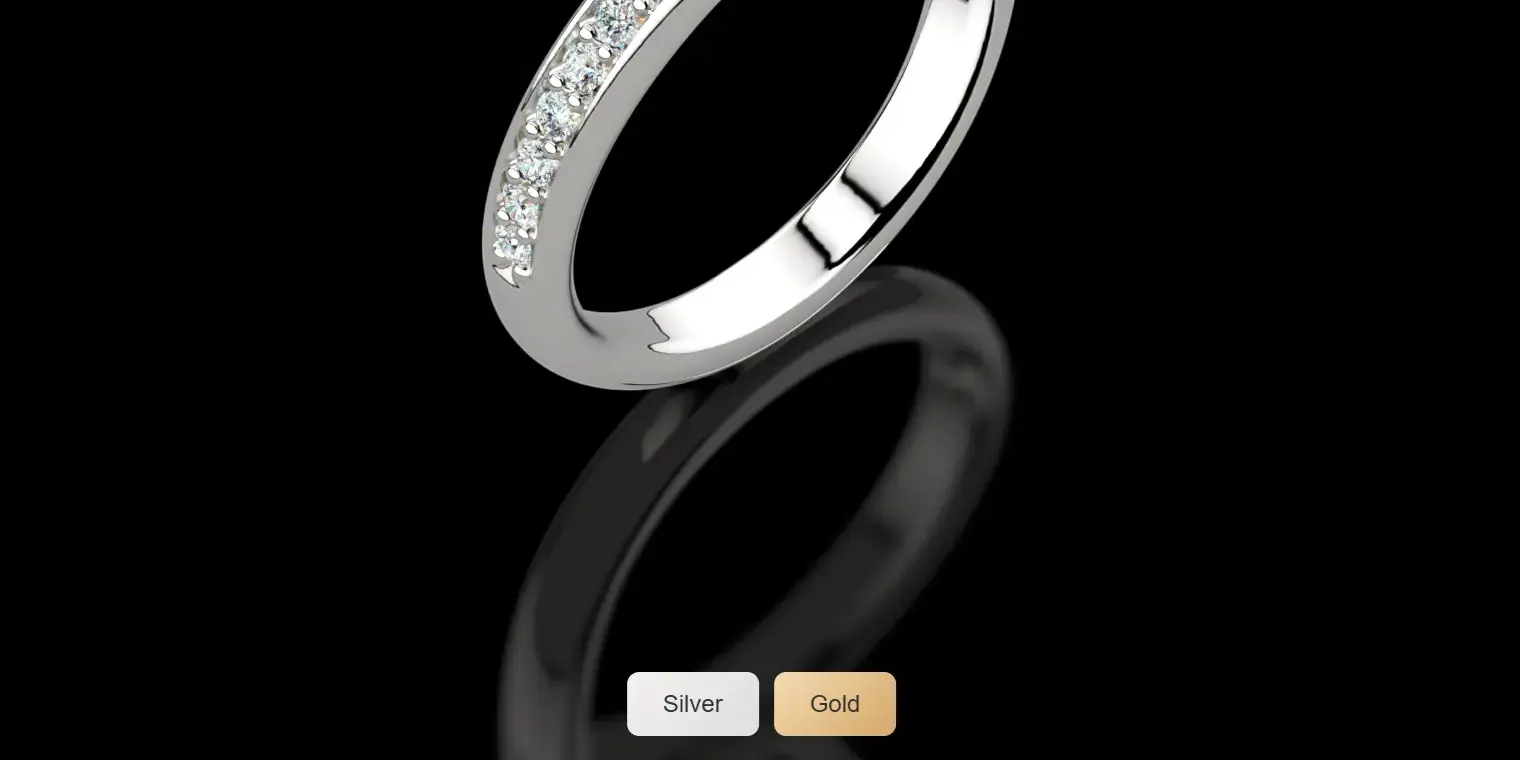
Let's build that.
Live Example: Check out our Maverick Excelsior Jewelry Catalog to see these techniques in action.
The Viewer SDK
The Viewer SDK gives your page task-oriented methods such as load() andsetMaterial(), plus lifecycle events such as scene-ready. The SDK owns the
rendering engine and keeps its WebAssembly transport private.
Let's Build Material Buttons
Here's the complete code. I've highlighted the new parts that we're adding on top of the basic viewer from last time:
<!DOCTYPE html>
<html lang="en">

<head>
    <meta charset="UTF-8">
    <meta name="viewport" content="width=device-width,initial-scale=1">
    <title>My Jewelry Configurator</title>
    <style>
        body {
            margin: 0;
            padding: 0;
            font-family: system-ui, -apple-system, sans-serif;
        }

        #viewer-container {
            width: 100vw;
            height: 100vh;
            position: relative;
        }

        #canvas-viewer {
            width: 100%;
            height: 100%;
            display: block;
        }

        /* 🆕 NEW: Our material buttons. Style them however you like. */
        .material-buttons {
            position: absolute;
            bottom: 20px;
            left: 50%;
            transform: translateX(-50%);
            display: flex;
            gap: 10px;
            z-index: 10;
        }

        .material-buttons button {
            padding: 12px 24px;
            font-size: 16px;
            font-weight: 500;
            border: none;
            border-radius: 8px;
            cursor: pointer;
            transition: transform 0.2s;
        }

        .material-buttons button:hover {
            transform: scale(1.05);
        }

        button.silver {
            background: linear-gradient(135deg, #f3f1f0, #ddd);
            color: #333;
        }

        button.gold {
            background: linear-gradient(135deg, #f4dab0, #d4a76a);
            color: #333;
        }
    </style>
</head>

<body>
    <div id="viewer-container">
        <canvas id="canvas-viewer" width="350" height="350"></canvas>

        <!-- 🆕 NEW: Here are the material buttons! -->
        <div class="material-buttons">
            <button class="silver" onclick="apply_material('Silver 925')">Silver</button>
            <button class="gold" onclick="apply_material('Yellow Gold 18k')">Gold</button>
        </div>
    </div>

    <script src="https://sdk.maverickexcelsior.com/webex-viewer-opengl/v2.0.0/webex-viewer.js"></script>
    <script>
        let viewer;

        function apply_material(material_name) {
            if (!viewer) return;
            viewer.setMaterial('Metal 01', material_name);
        }

        async function init() {
            viewer = await WebexViewer.mount({
                canvas: '#canvas-viewer',
                apiKey: 'YOUR_VIEWER_SDK_KEY',
                background: '#000000'
            });

            viewer.once('scene-ready', () => {
                apply_material('Silver 925');
            });
            await viewer.load('https://mycompany.com/my-ring.webex');
        }

        // Start when page loads
        if (document.readyState === 'loading') {
            document.addEventListener('DOMContentLoaded', init);
        } else {
            init();
        }
    </script>
</body>

</html>
The Important Parts Explained
1. The Apply Material Function
function apply_material(material_name) {
    if (viewer) viewer.setMaterial('Metal 01', material_name);
}
setMaterial() takes the layer name and the material name. Layer names are
case-sensitive and must match the scene.
2. Listening for the Model to Load
viewer.once('scene-ready', () => {
    apply_material('Silver 925');
});
The semantic scene-ready event tells you when the loaded scene can be used.
3. The Buttons
<button onclick="apply_material('Silver 925')">Silver</button>
<button onclick="apply_material('Yellow Gold 18k')">Gold</button>
Simple HTML buttons that call our function when clicked. Nothing fancy here. Since these are just regular HTML and CSS, you can style them however you want and place them anywhere on your page.
Important: The layer name (like 'Metal 01') must match exactly what you named it in Rhino. The material name (like 'Silver 925') can be any of the built-in materials from Maverick Excelsior.
Pro Tips
- Wait for the model to load - Enable configurator controls after
scene-ready - Use the exact layer names - They're case-sensitive. "Metal 01" is not the same as "metal 01"
- Test on mobile - Your buttons should be big enough for fingers, not just mouse clicks
Beyond Materials: What Else Can You Control?
Changing materials is just the beginning. The SDK also provides semantic
methods for camera control, auto-spin, scene properties, captures, and product
configuration.
All these methods and more are documented at docs.maverickexcelsior.com.
What's Next?
Now that you can control the viewer, you might want to:
- Update your product price when materials change
- Save the customer's selection to a shopping cart
- Show a loading spinner while materials change
- Add more options like stone colors or engraving
- Create a full product configurator with multiple customization options
For example, when someone clicks "Gold", you could update the price displayed on your page, change the product description to "18k Yellow Gold Ring", and remember their choice when they click "Add to Cart". The viewer handles the 3D part, and your regular JavaScript handles everything else.
But that's getting into regular web development territory.
Want to see what's possible when you combine all these techniques? Check out our jewelry catalog It's a full example of viewer integration with material switching, dynamic pricing, and more.
The Bottom Line
With about 20 lines of JavaScript, you've turned a 3D model into an interactive product configurator. Your customers can now see exactly what they're buying, in the material they want, before they add it to their cart.
That's the power of talking to your viewer.
Happy configuring!
Questions? Need help? Drop us a line at [email protected].